User Guide
Installing Otto
- Install docker if you don't have it yet.
- Download the
docker-compose.ymlfile from otto_docker repository (need to update link once we change the org name) - Run
docker compose upwhere thedocker-compose.ymlfile is saved. - Enter http://localhost:3001 in your browser to access the page.
Creating a Workflow
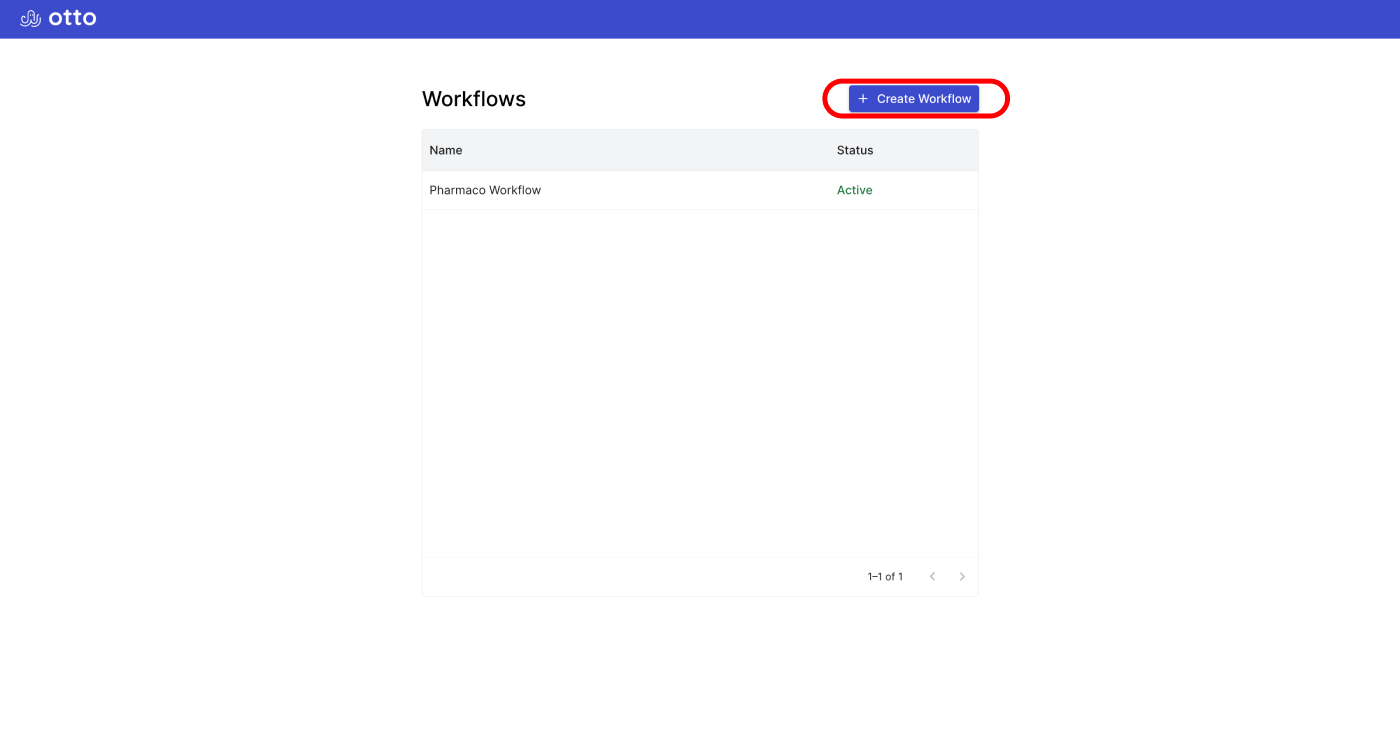
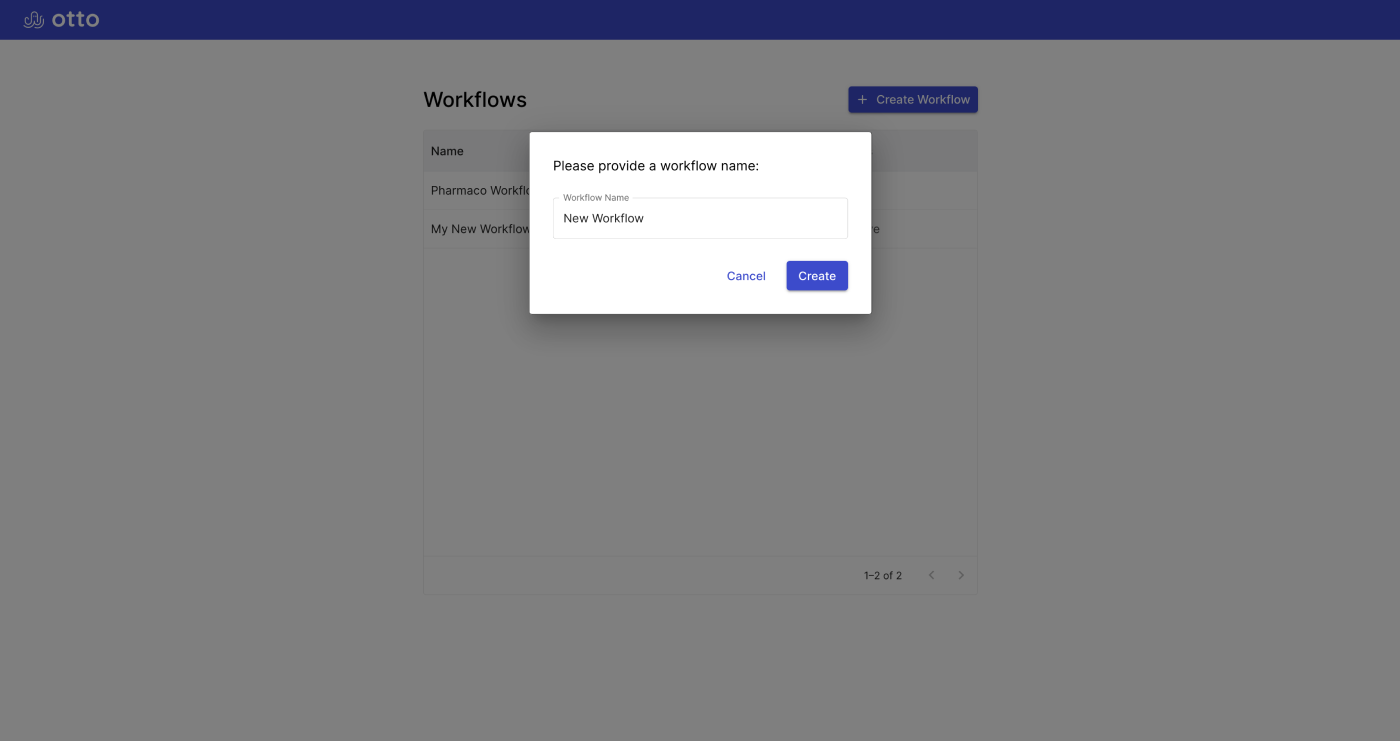
Creating a Workflow
Click “+ Create Workflow”
Enter your workflow’s name
Click “Create”
Editing a Workflow
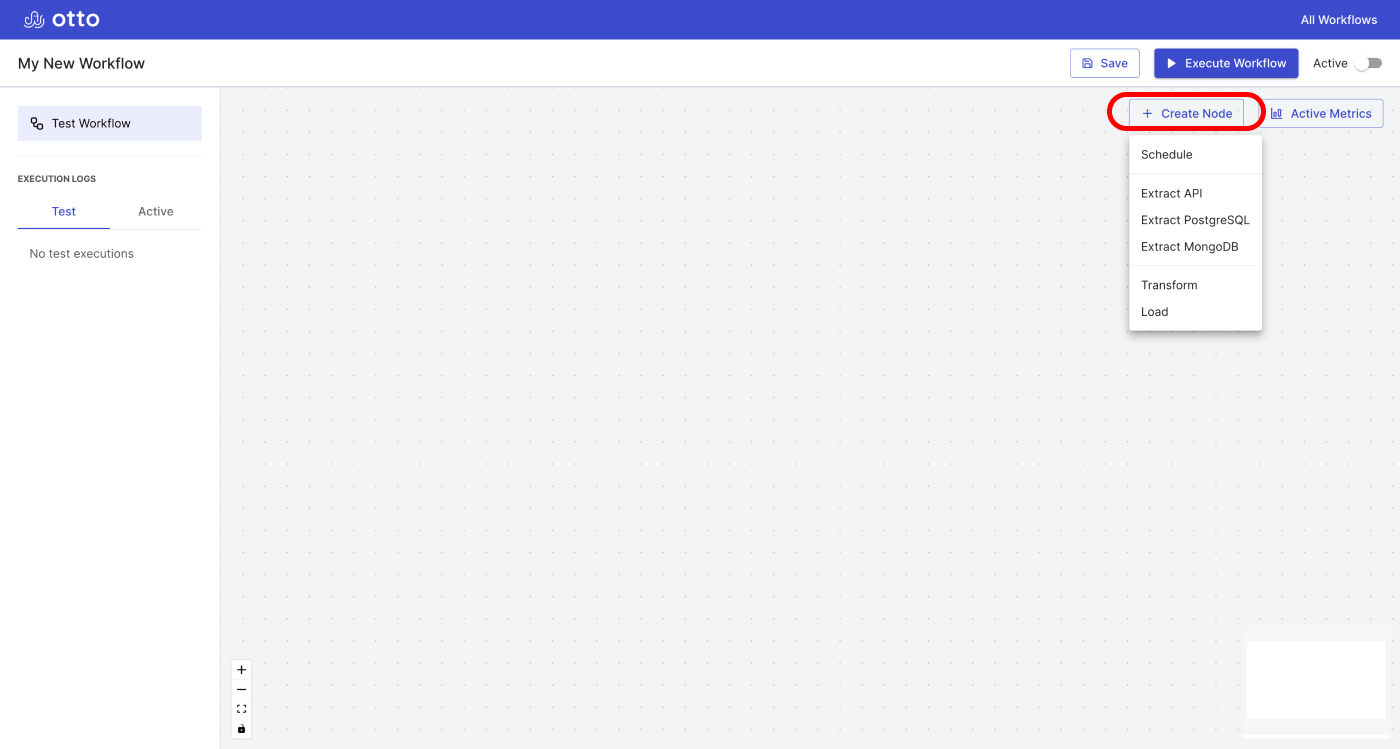
Creating a Node
- Click “+ Create Node”
- Choose a Node Type
- Typically, you want at least one of each major type: schedule, extract, transform, load
Editing a Node
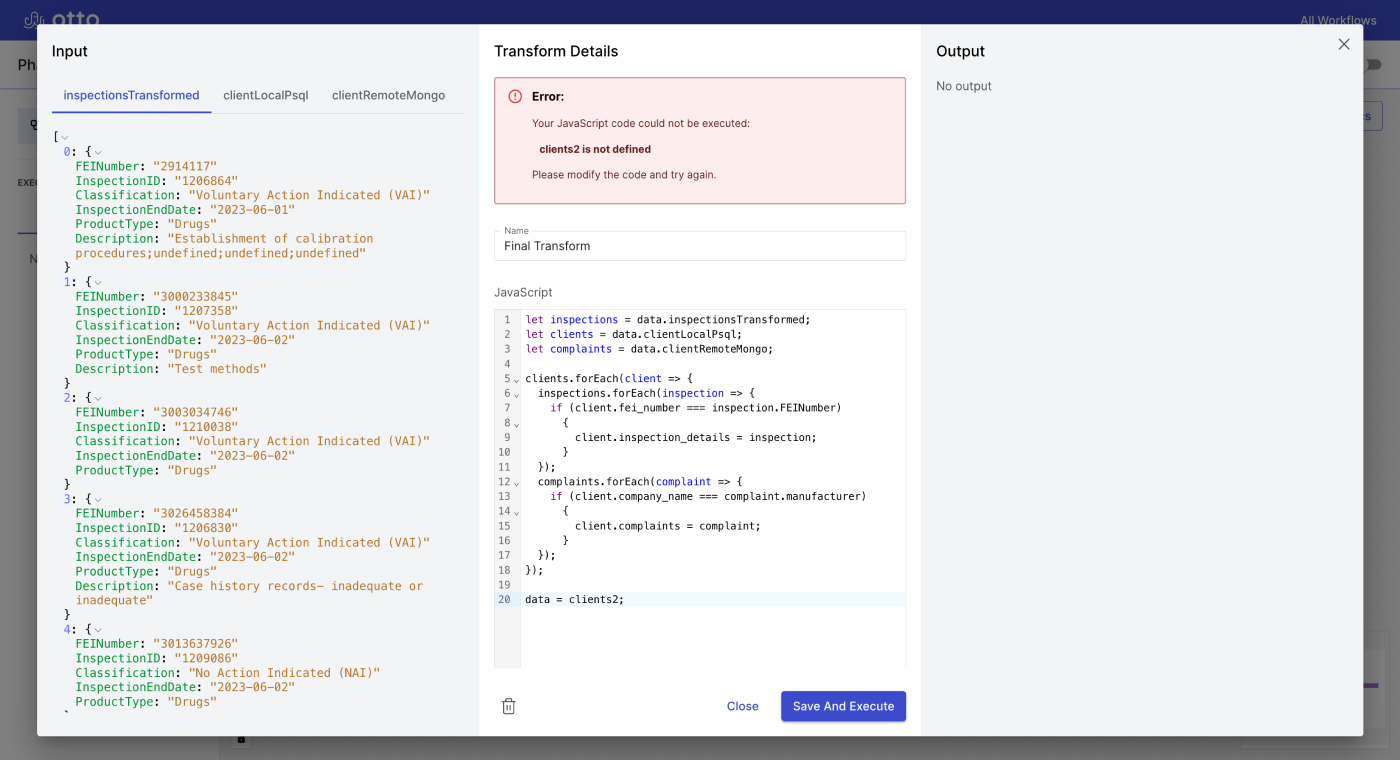
Click on a node
A node modal appears
- Data that is pulled from the previous node(s) appears on the left section of the modal. Schedule nodes and extract nodes will never have content present here.
- The center section of the modal contains fields within which to define pertinent information. What is displayed here is dependent on what node type you are editing.
- Data that is returned by the node’s execution is displayed on the right section. Schedule nodes will never have content present here.
Fill in the fields in the middle section of the node modal with the appropriate information.
Click “Save” for schedule nodes or “Save And Execute” for all other nodes.
You can also delete the node by clicking on the trash can present in the modal’s middle section.

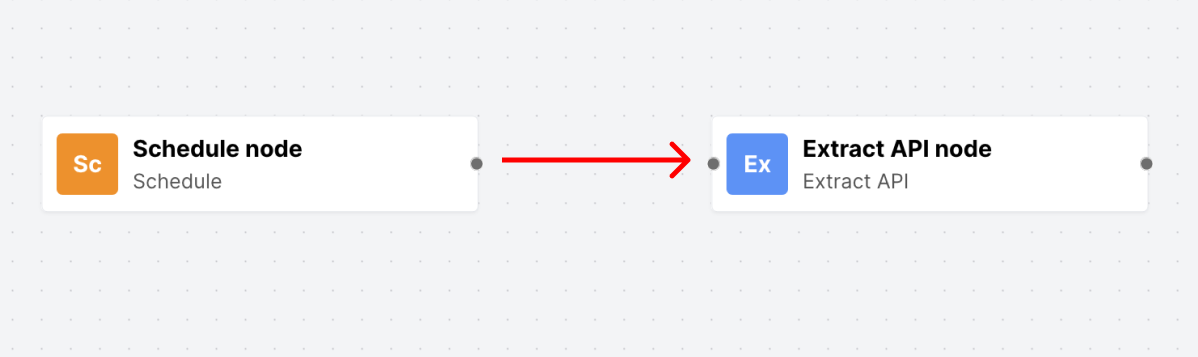
Connecting Nodes
Click on the right dot of the node you wish to be executed earlier in the sequence and drag the line that appears to the left dot of the node you wish to be executed later in the sequence.
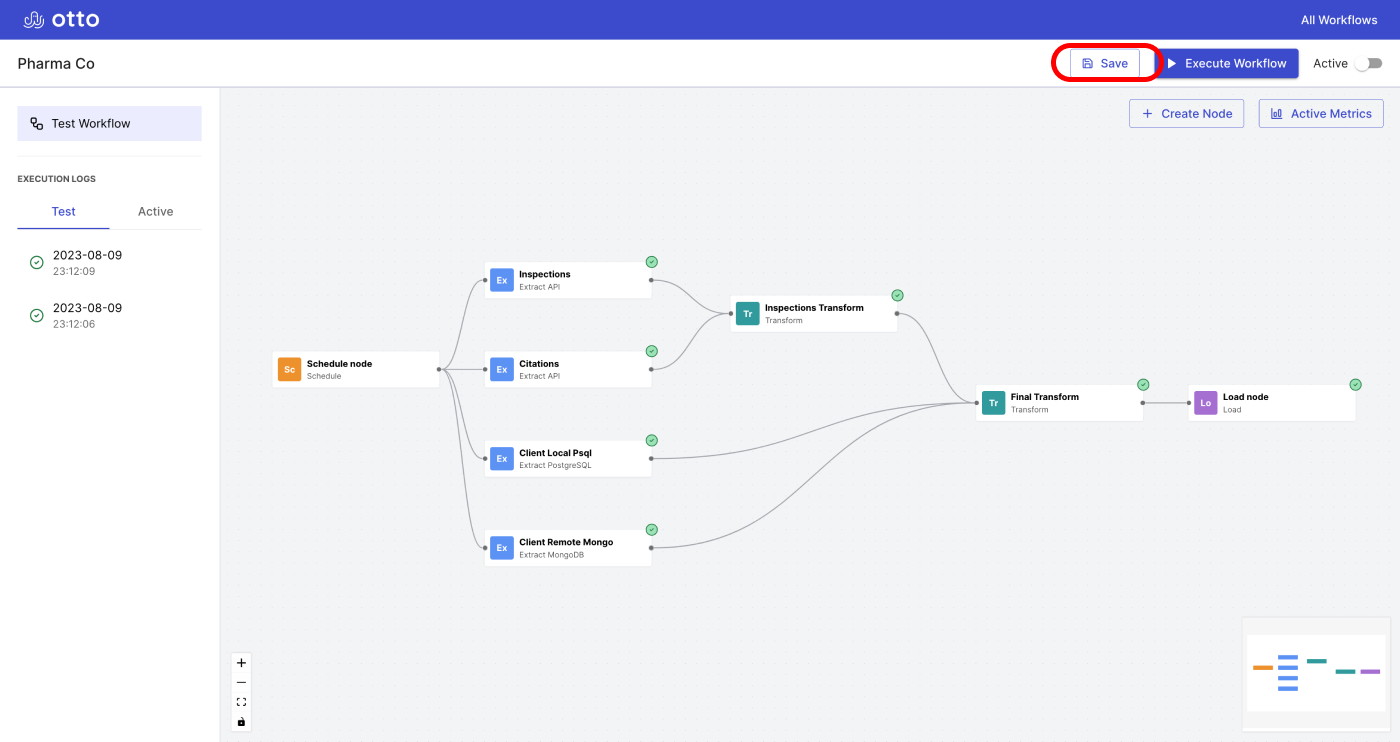
When the workflow is saved
You can manually save the workflow by clicking on the “Save” button on the workflow edit screen and by clicking “Save” or “Save And Execute” in the workflow modal.
The workflow is also automatically saved whenever a node modal is displayed.
Executing the Workflow
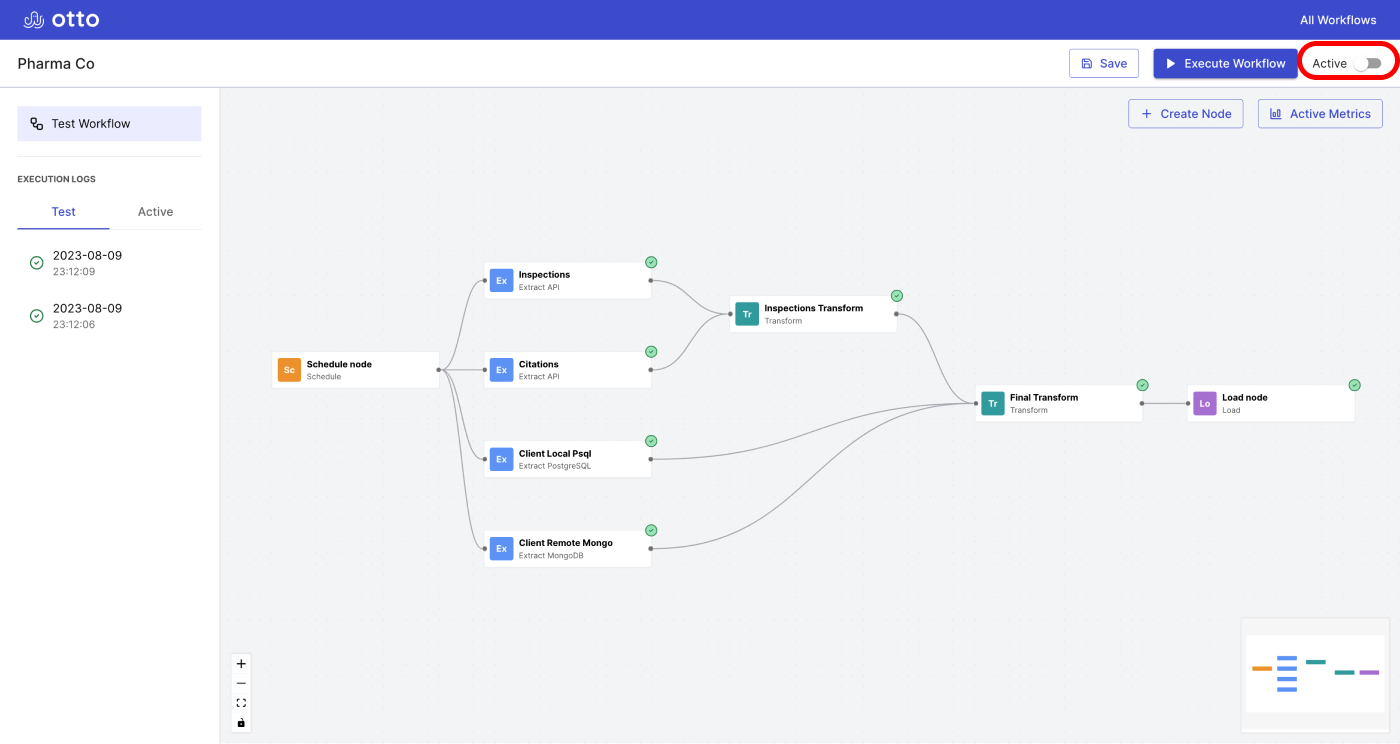
Active Workflows
A workflow has two states: Active or Test.
User can toggle the active state by clicking the "Active" switch on the workflow edit screen
During Test phase, you can:
- Edit and save the workflow
- Execute individual nodes
During Active phase, the workflow is set to execute at the time and interval given in the workflow’s schedule node
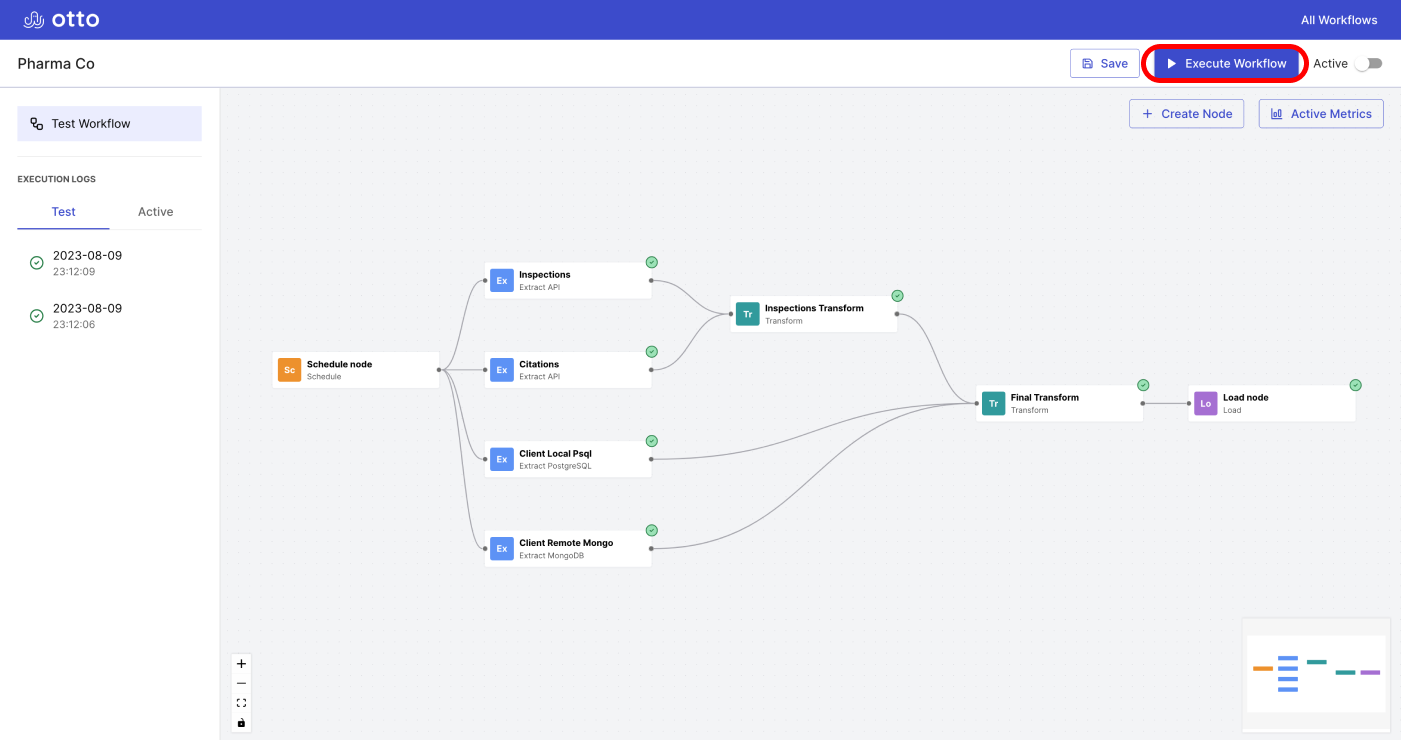
Manual Executions
Regardless of which state the workflow is in, it can be manually executed using the “Execute Workflow” button.
The button can only be clicked, however, when the workflow is in a completed state, with at least one of each major node type: schedule, extract, transform, and load.
Logs and Metrics
Test vs. Active Executions
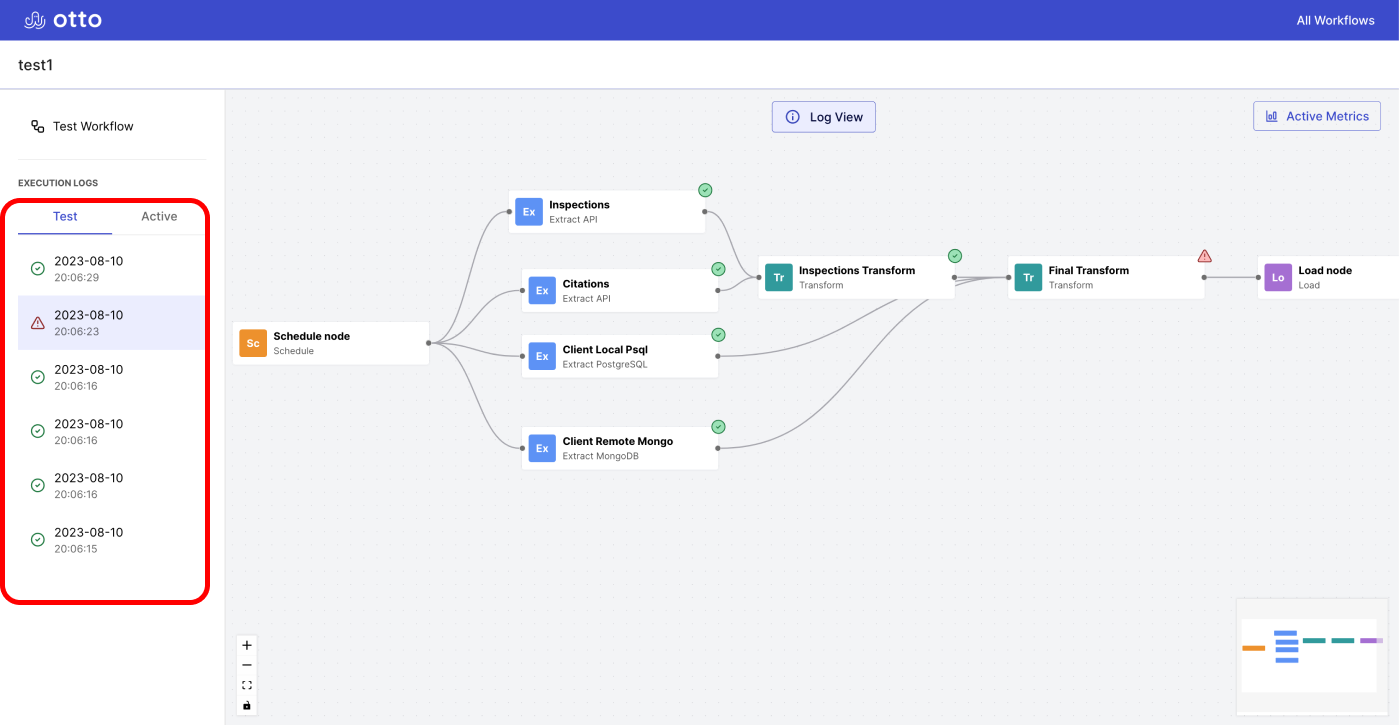
- All full workflow executions are saved and displayed in the “EXECUTION LOGS” sidebar.
- Execution logs are separated into those executions performed while the workflow is in its Test state and those executions performed while the workflow is in its Active state.
- You can click on the “Test” and “Active” tabs in the sidebar to view the respective list of executions.
Viewing an Execution
You can view a particular execution by clicking on the execution log in the sidebar.
The workflow’s state at the end of the execution will be displayed in the workflow workspace. Here, you can view each node’s input and output at the time of the execution. You can also view what nodes executed successfully. If an error occurred during a node’s execution, you can view the error message returned by that node.
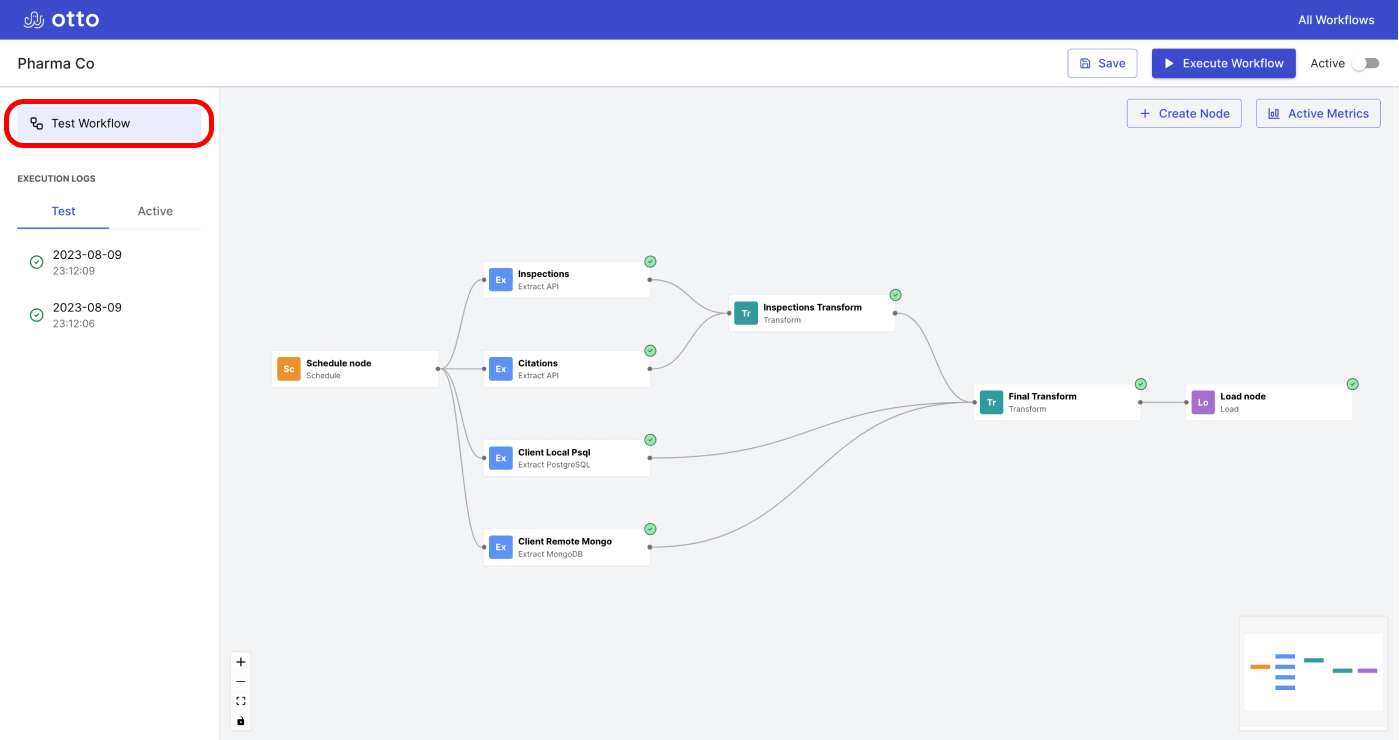
Returning to Edit Mode (Text/Active Workflow)
You can return to the current version of the workflow by on “Test Workflow” if the workflow is in Test mode, or by clicking on “Active Workflow” if the workflow is in Active mode.
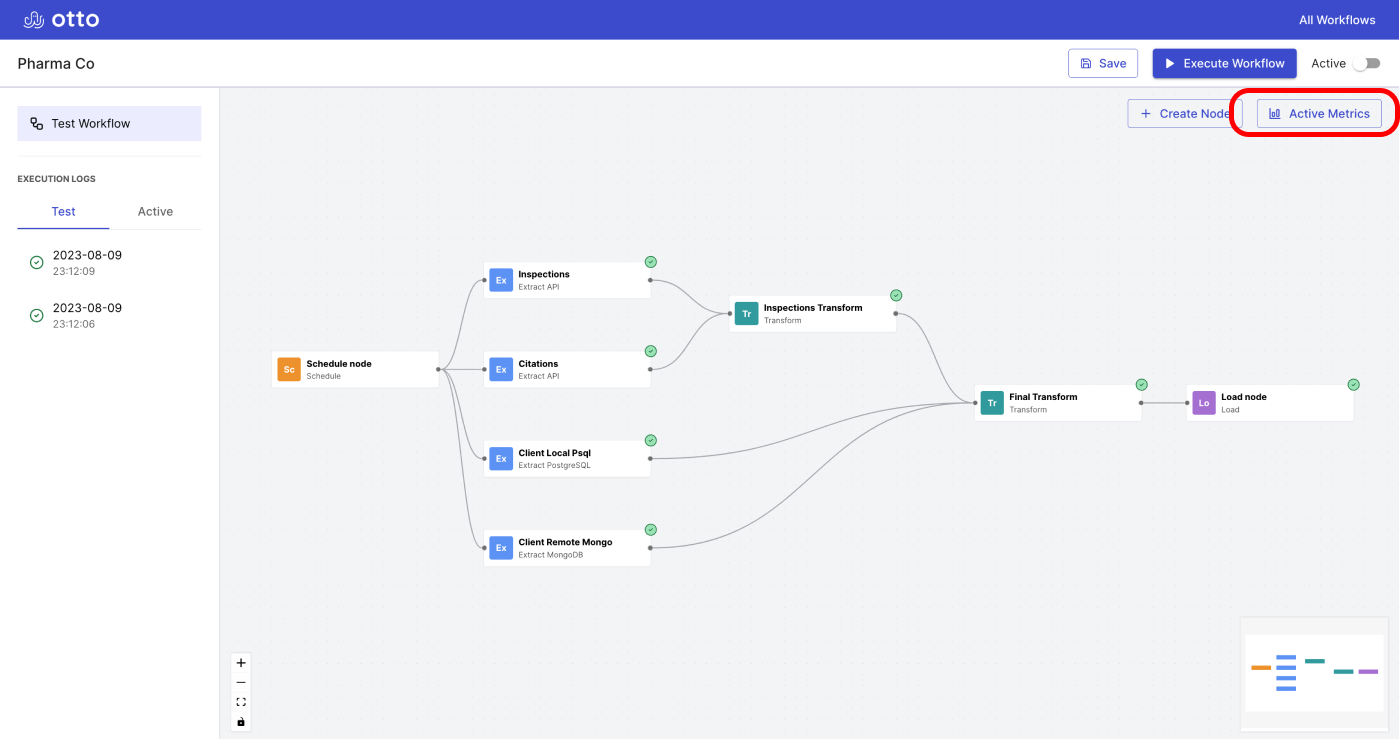
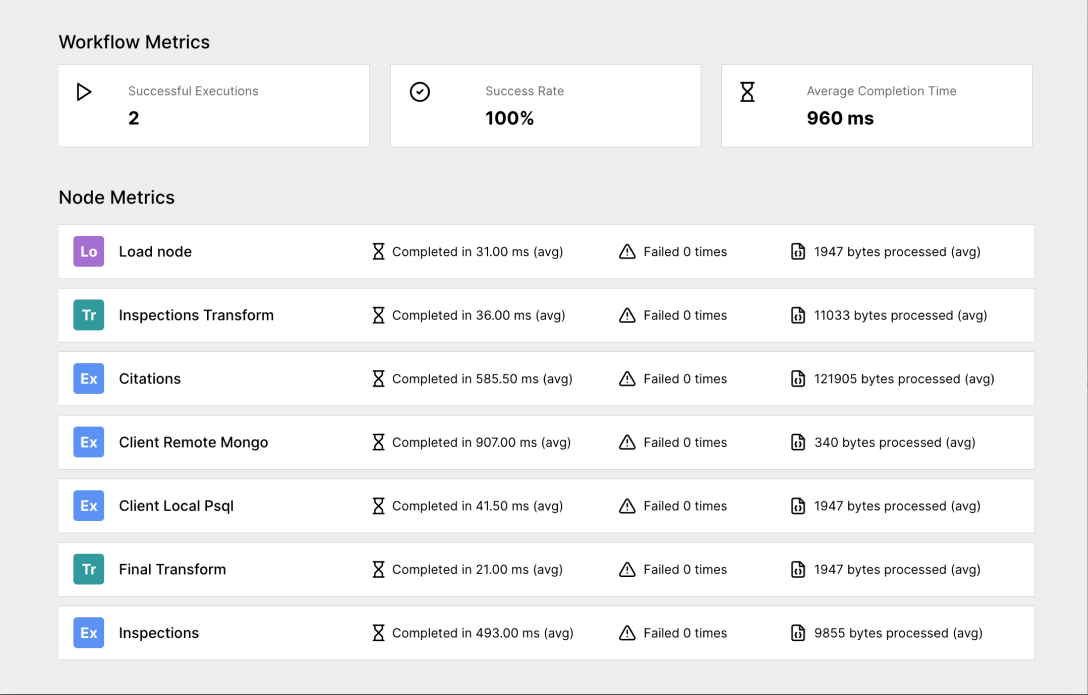
Active Metrics
Otto tracks metrics for the current version of the active workflow. Those metrics can be viewed by clicking on the “Active Metrics” button in the workflow workspace.
Returning to Workflows page
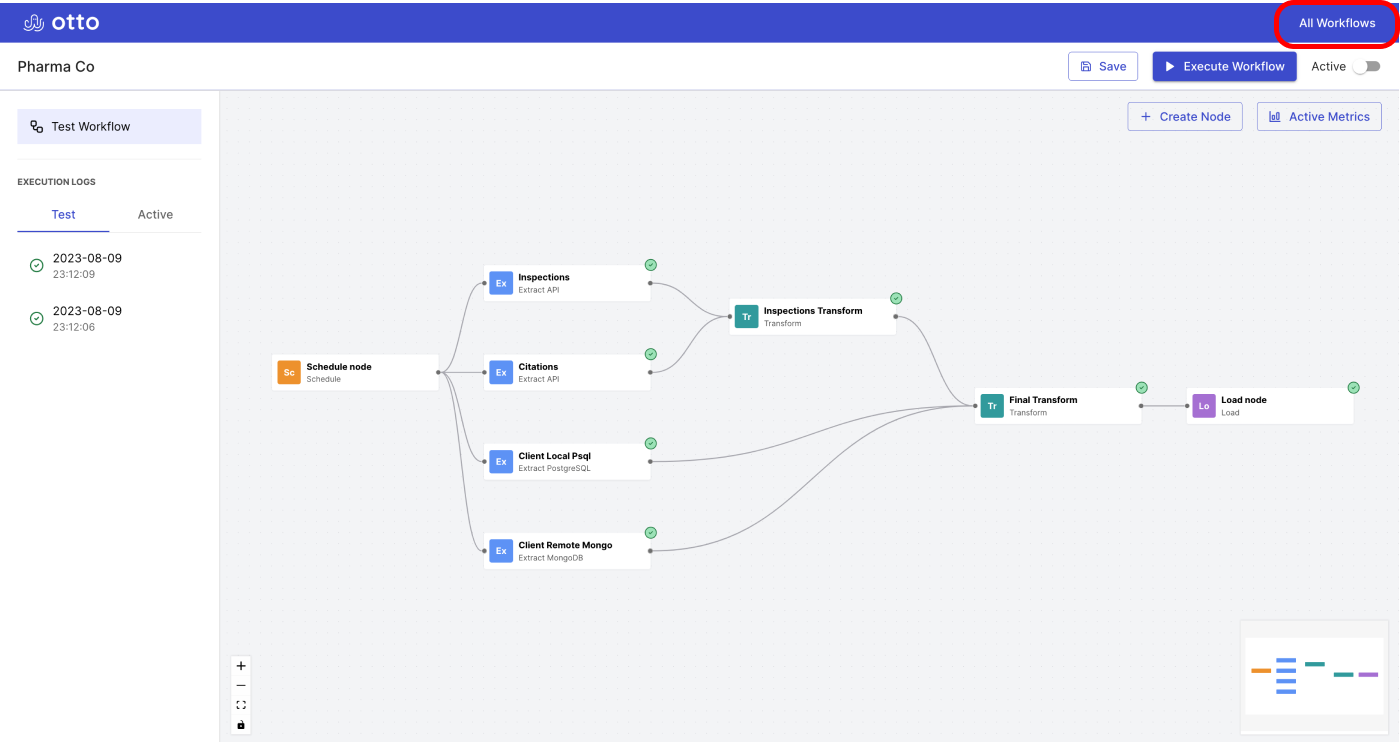
- From the Workflow Edit Screen, you can return to the Workflows Screen by clicking “All Workflows”.